Intermediate Tutorial: Creating an Inn Event
To prepare to place an event, choose Event Mode, either by the Mode option on the top menu or by choosing the "E".
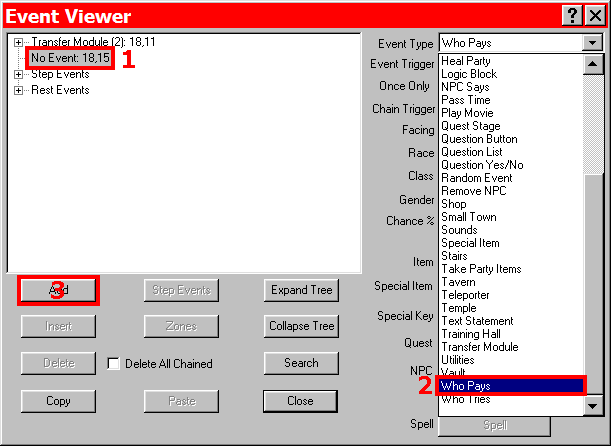
- To place the Who Pays event, click on the square you wish to hold the event. This will open the Event Editor. The event slot for the chosen square will be highlighted.
- From the Event Type dropdown menu, choose Who Pays.
- Click "Add" to open the event dialog.
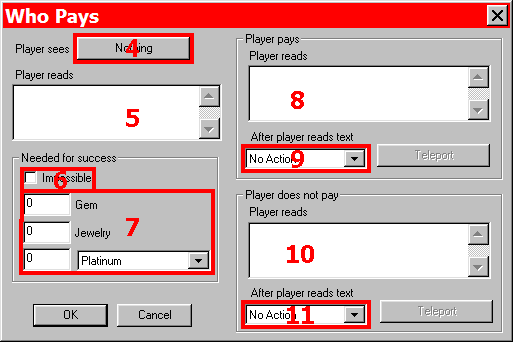
- Choose an image to represent the innkeep or the inn. This image must be a small pic.
- Enter a message for the player to read. This message will display every time the event is activated.
- If you wish to make this event impossible select this box, though not for this particular event.
- Choose the cost in either gems, jewelry or coins or in combination. The dropdown menu for money type allows you to choose which type of coin.
- Enter a message for the player to read if they pay the required cost.
- This dropdown menu chooses what, if anything, will happen upon successful payment. The options are 'No Action' which does nothing; 'Chain to Event' which creates a chain option for this event in the event editor, 'Teleport' which activates the button beside the menu and allows you to determine a location to teleport the party to; and 'Backup One Step When Done' which moves the party back one square in the direction they just came from. For purposes of creating an inn, select 'Chain to Event'.
- Enter a message for the player to read if they do not pay the required cost.
- This dropdown menu is exactly the same as the one detailed above. For creating the inn, select 'Backup One Step When Done'. Click "OK".
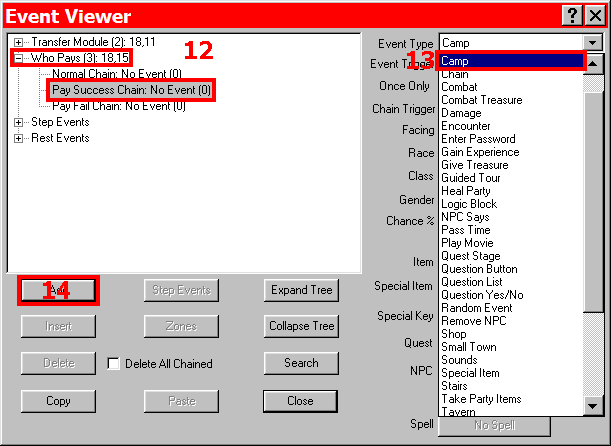
- Click the '+' next to the Who Pays event that was just added, and select Pay Success Chain.
- From the Event Type list, select 'Camp'.
- Click "Add" to open the event dialog.
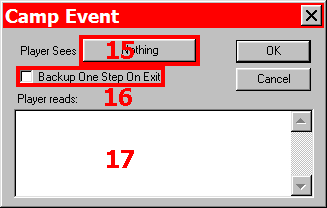
- Use this button to select an image for the player to see, such as the Camp small pic.
- Check this box to have the party backup one step when the event is done.
- A message in this text box will be seen every time this event is activated.
Choosing Who Pays Event
Choosing Who Pays Event
Choosing Camp Event
Camp Event